We have all been there, we create a document, and then we need to get it approved by a manager, whether it be something small, like a memo that needs to go out, or a large training document. Usually, we attach the document to an email, then any discussion that will occur will either be in the email string, an in-person conversation, or by comments in the document itself. This is a great way to get an okay on the document from the people that need to approve it.
It does, however, have a few downfalls, such as forgetting to click on “Reply all”, leaving some people without the discussion points that you are bringing up. It also leads to long strings of emails, that people will have to read through, and sometimes leads to exhaustion when trying to find something previously discussed.
What if there was a way we could get the approval, have all of our discussions, and keep it right in Teams?. Well, if that’s what you are hoping for, I have a solution for you.
Note: The Approvals app in Teams is turned on by default. If you do not have access to Approvals, please speak to your administrator.
Approvals App in Microsoft Teams
That’s right! Your solution is all housed right inside Teams! There are a few ways that we can create approvals, but today, we are going to create one that is housed right inside one of our Teams channels, so we can have discussions around it, and they will all be located in the same spot.
Start by finding the team that you want to create your approval. As a note, the approver needs to be in the channel that you are posting your Approval, if they are not, you will not be able to search their name. We will then create a conversation in the channel we want to post the approval in, but instead of writing anything, we are going to look under our conversation bar, and look for the “Approvals” app, or in your chat bar, you can simply type in "@approvals".


Creating Your Approval
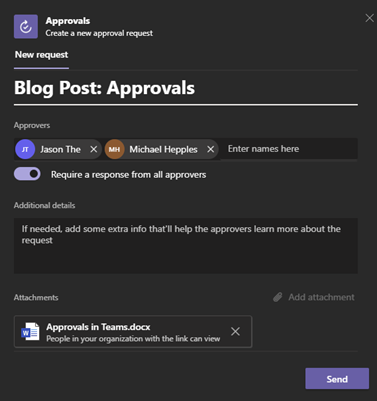
You will then get a pop-up, and you can begin putting your approval together. We will first need to name it something easy to understand, so that your approvers will not have to be guessing as to what it is, defeating the purpose of this process.
Once named, you will need to enter who your approvers will be for this document. You may put more than one approver in the approvers' box, depending on who needs to look at it. You may also require a response from all of the approvers named, you can do so by simply clicking on the “Require a response from all approvers” toggle.
Once you have entered your approvers and decided if they all need to approve, you can then add additional details. This is where you can enter all the information to help approvers learn more about the request. If you work in an environment where documents are being approved quite a bit, this can be your lifesaver! It helps the approver have a full understanding and will make it so they know what the documentation is going into the approval process, so make sure that you are giving enough detail to help them out.
Now you can attach your document that you want to be approved. The document can either be in OneDrive, on your personal computer, or a link that you can attach.
The last piece you will see is custom responses. These are responses that aren’t the standard approve, and reject. You can enter anything into the custom responses, but again, make sure that you are keeping it short and to the point for the approver.
Your final product should look like this:

Now that you have completed your approval, hit Send. This will put the approval in the channel that you have chosen earlier and can be approved, rejected, and discussed directly within Microsoft Teams.
Note: This will show the outcome and conversations to everyone in the channel.
Creating a Private Approval
If you want to create an approval that is not seen by an entire team, as it may be something personal, the steps are just as easy.
Start by opening a private conversation with your approver, then following the above steps to complete your approval.
Note: You will only be allowed to enter the name of the person you are in the private conversation with in the approvers field.
Approving or Rejecting Your Approvals
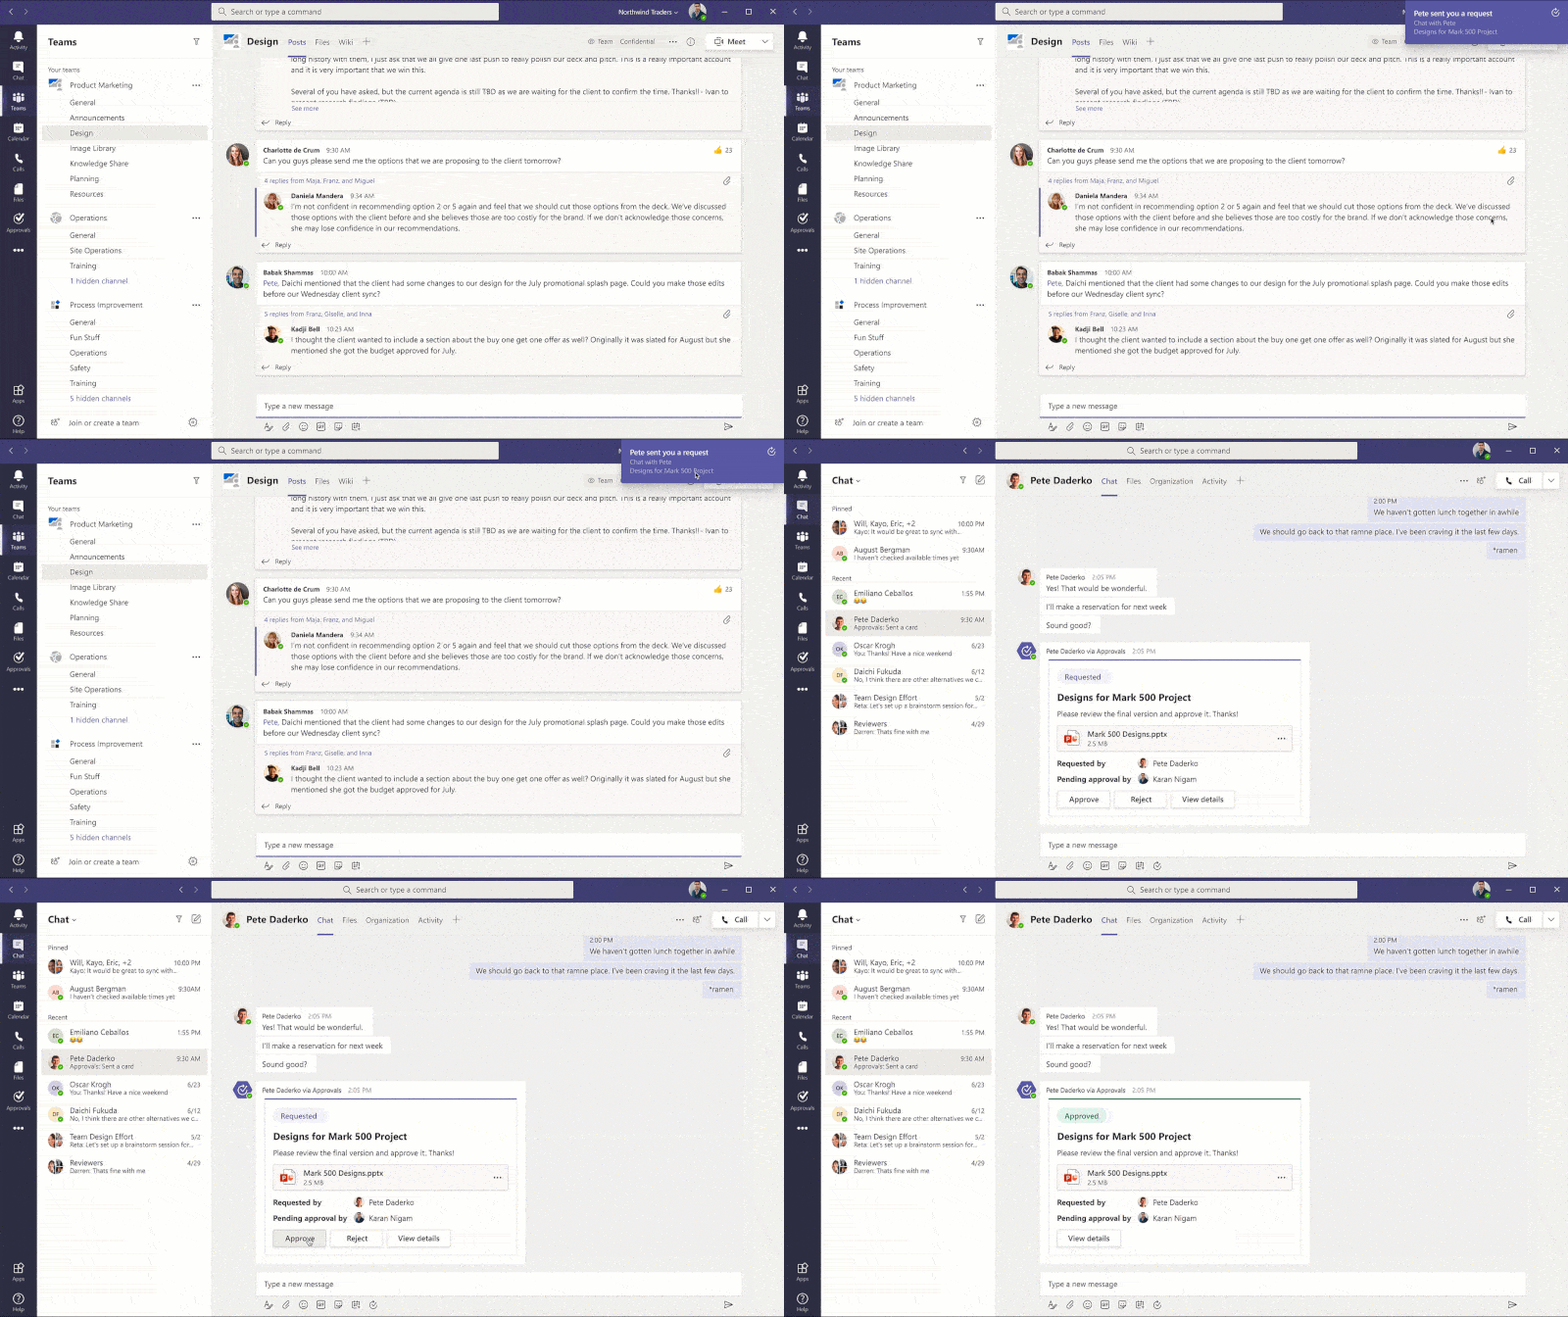
If you are the document approver, approving documentation is now easier than ever. When the approval comes through, it will appear in the channel that the employee has decided to place it. As stated above, you can only put approvals into channels that have your approvers already in them.
You will receive a notification that you can click on, and it will bring you directly to the Teams channel that it was posted. You can then view the details, open the document, then make the decision if you want to approve or reject it, and add your comments. You may also edit the document directly, or even hold a conversation about the documentation just as you would any other Teams chat.

Tracking and Managing Approvals
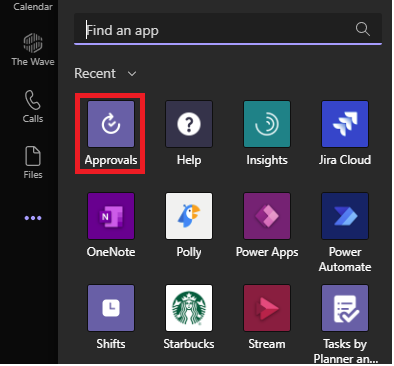
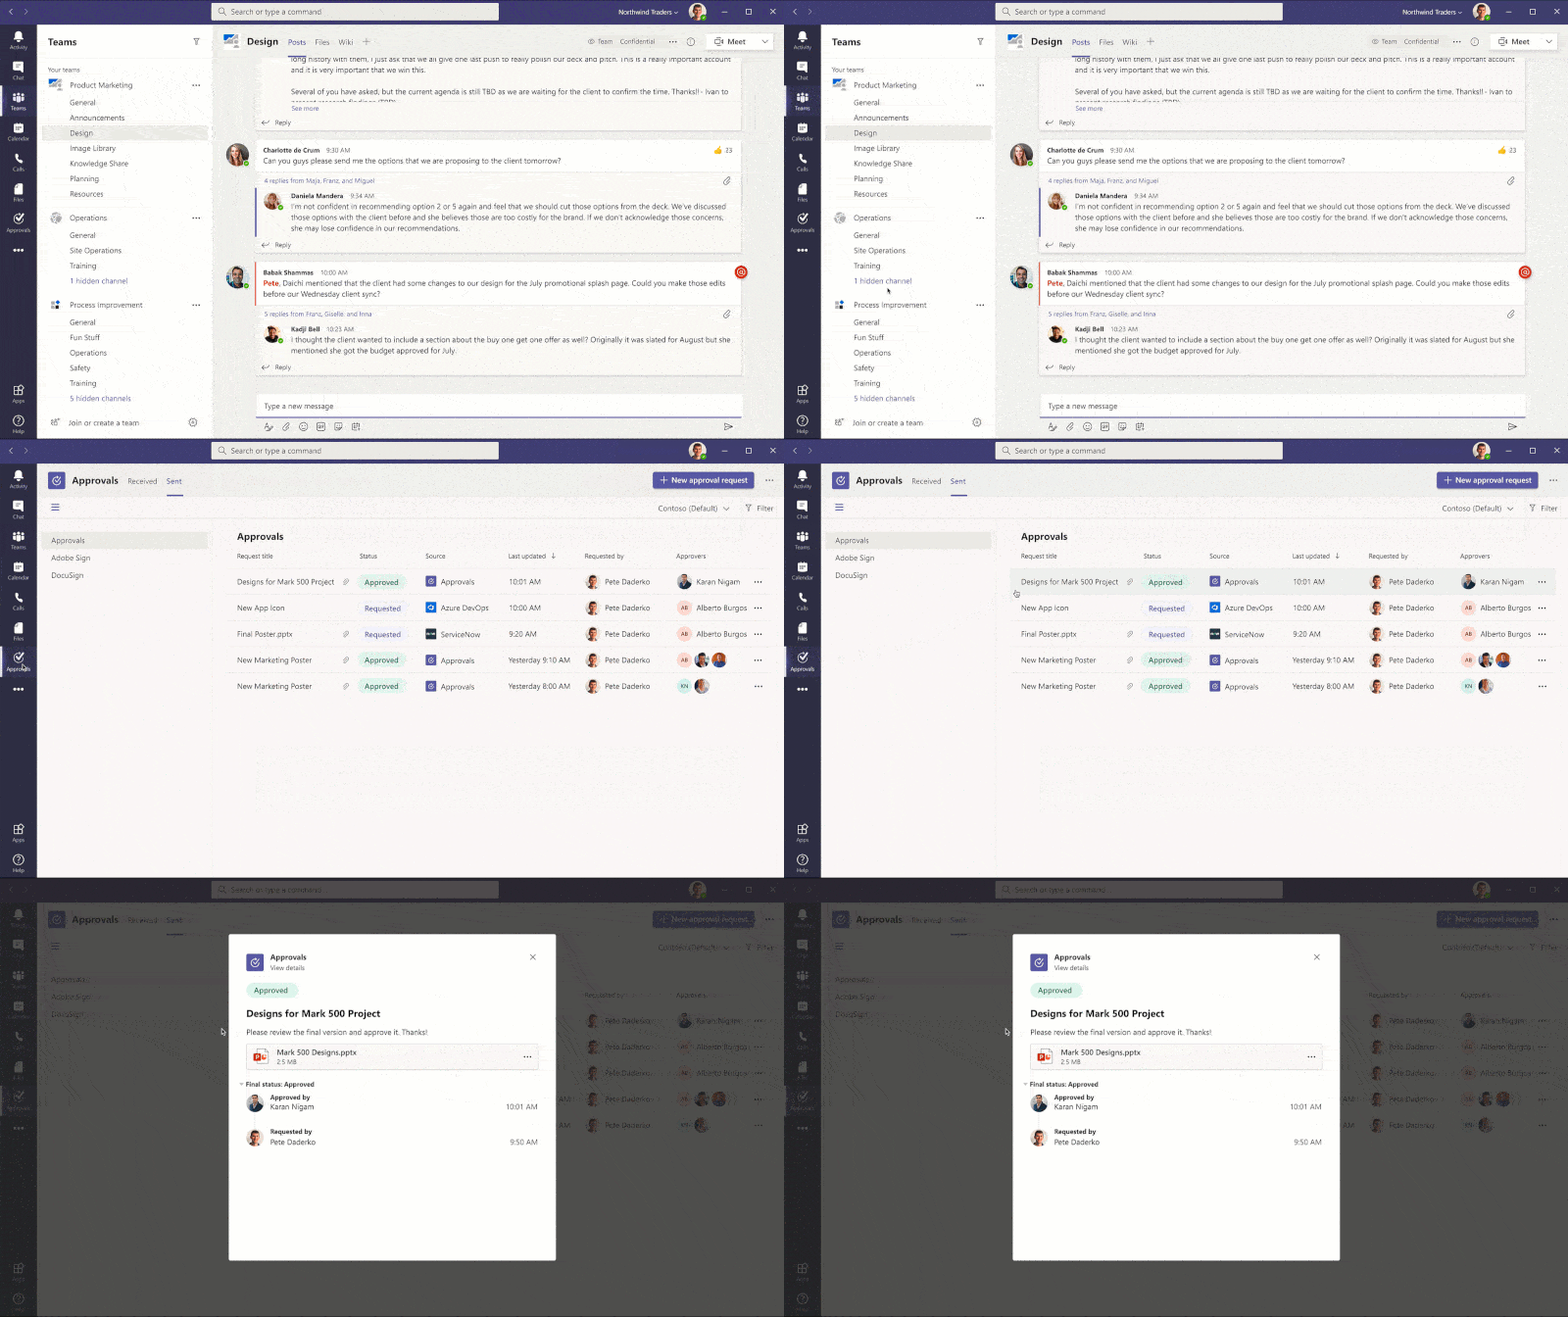
The final thing that we can do using the Approval app in Teams is track and manage all of our approvals. To do this, all we need to do is go to our Approvals app, which if it isn’t pinned, we will go to our “…” in the sidebar, and search for "Approvals".

From here, you will see all of the approvals that you have received. This will include everything you have responded to, and anything that may be pending. You will get the details such as Status (approved or rejected), Source (which channel it is located in), Requestors, and Approvers. You can click on a request and access its details and relevant documentation.

What Else Can You Do?
The Approvals app in Microsoft Teams opens the door for numerous out of the box implementations. It can be used for internal operations such as leave requests, social media content reviews, client discounts discussions, and any thing else you can think of! You could even put a task together for your development team, with all the details and documentation within, and use the custom responses for someone to claim the task at hand based on their available bandwidth.
There are many ways that you can leverage Approvals, and all within Microsoft Teams, enabling you to fully trace everything involved in the process. Now that we've shown you a small piece of its capabilities, how are you planning to use it within your organization?


