In a time where most of our communication is in digital form, your Outlook signature is your new business card. This can be a quick and easy way to provide your information to the recipients of the email. Your signature should include ways to contact you, and something like a company logo to set you apart from the large number of emails people receive every day.
At this time, Microsoft does not have signature syncing across Online and your local version of Outlook (they plan on rolling it out in September). I will be showing you how to add your signatures to both your Outlook 365 and your local version.
Adding your signature in Outlook 365
Adding your signature in Outlook 365 is a fast and easy process. Begin with opening up your Outlook 365, by either going to outlook.office.com, or by clicking the Waffle (nine dots in the top right corner).
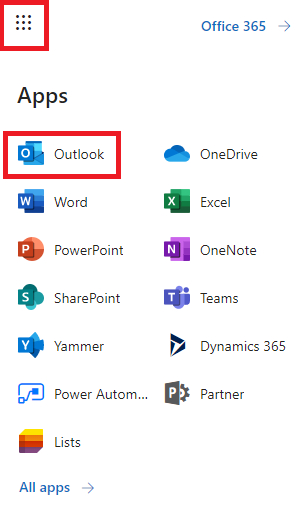
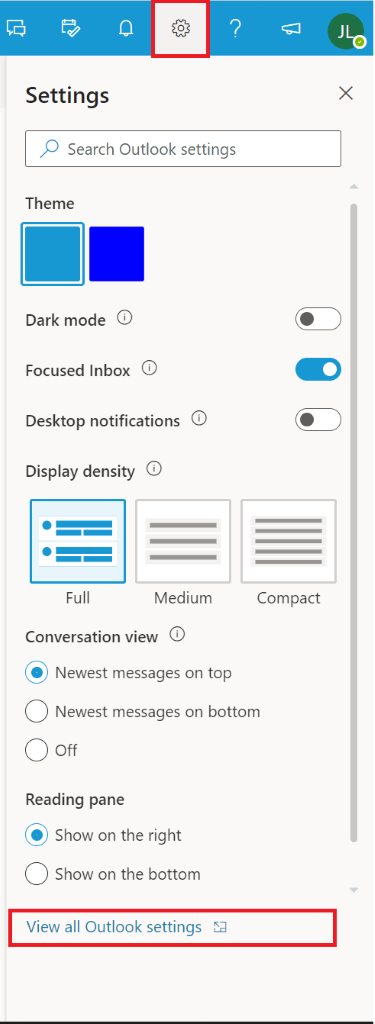
Once you have signed into your Outlook 365, you then click on the gear in the top right-hand corner and then select the View all Outlook Settings.
The mail setting will already be selected. You will then select Compose and Reply. You will then see all of your Email Signature settings. You can either create your signature or create it from a Microsoft Template.
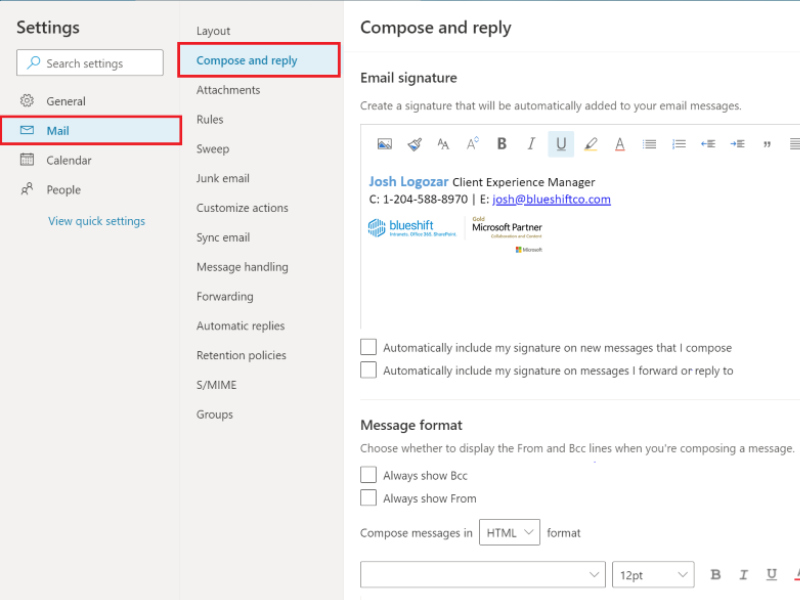
An important thing to note is below the Email signature box, there is an option to include your signature in all the messages you compose, or to include it on all messages your forward or reply to. Make sure to select the options that best suit you. Another thing to note is that in Outlook 365, you cannot have more than one signature. When your signature looks exactly how you want it to, click on save.
Using your signature in Outlook 365
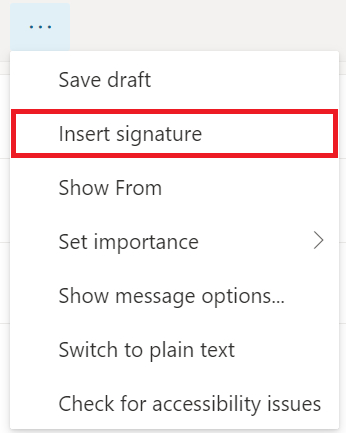
If you have decided that you didn’t want to have your signature included on all the emails you compose or reply too, here is how you add it. Start by creating a new email and filling out all the sections that need to be completed (who it’s to, any CC that might need to be included, and of course, the body of the email). To include your signature simply click on the 3 dots, click Insert Signature and then you are good to go!

Adding your signature in Outlook desktop application
As mentioned above, the signatures DO NOT sync between Outlook Online, and the Outlook desktop application. So, this means that if you have set it up in the web-based version, you will still have to set it up on your desktop application, and here is how you set it up:
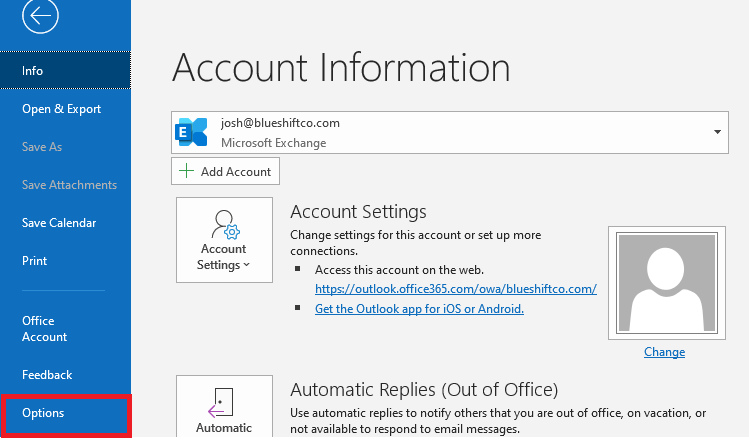
First thing to start with is to go to File, then to options. It’s going to pull up all of your outlook options.
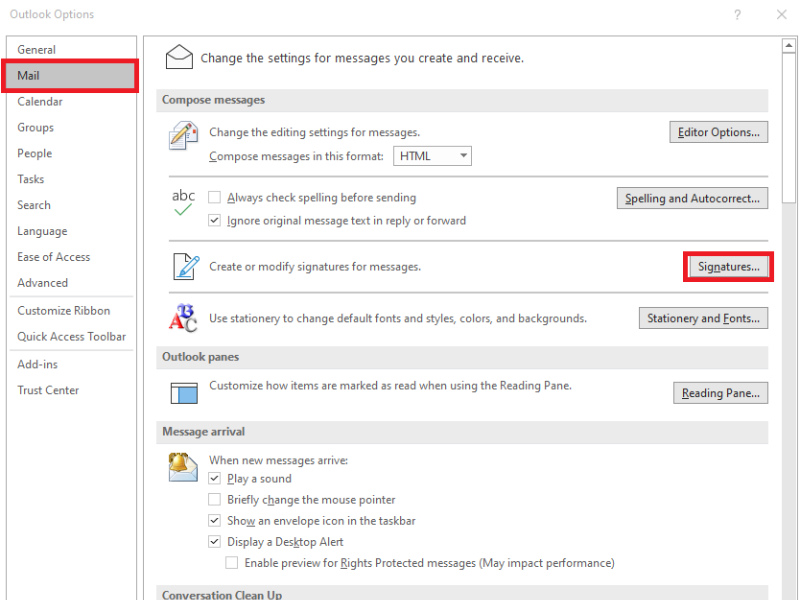
Then, in the option sidebar, you will select mail, and then signatures.
Once you are in the Email signature page, you must create a new signature. You can do this by clicking on New. Note, you also have the options to delete and rename your signature depending on which signature it is.

Once you put the signature that you would like in, you then click on save. This will save it as Signature, and it can be changed. The other option that you have is picking when and which signature will be used and when. You can choose to put a signature in all your new messages or in all of your replies and forwards.
If you feel like you want more control over which signatures you want to put in, then you can leave the New messages and Replies as none, and add them manually to every email you see fit.
Using your signature in Outlook desktop application
After you write your email, adding your signature is easier than ever. You just need to click on insert, and then click on the signature that you would like depending on the email you are responding too. For example, if it is something that you have been back and forth on quite a bit, you can just create a shorter version of your signature, not including all the bells and whistles. It can be as easy as your name, maybe your phone number, and that’s it.

I hope that this will make your emails a little more personal and give the recipients of your emails a little more information about you. As stated before, this is the digital business card, be sure to put your best foot, and personality, forward.


