We have built out our first ever SharePoint Online site, if you haven’t, check out our blog manage and collaborate using SharePoint Online, and build your own! Today, we are going to do a really quick general overview of the Gear button, which can be found in the top right of your site.

When you click on it, you are going to receive a dropdown with quite a few options. Today, we are just going to give you a general overview of what each one does, and then later we will do a deeper dive into some of the more important ones. Note that for most of these, you will need to be the site owner, or the SharePoint Administrator to use them.
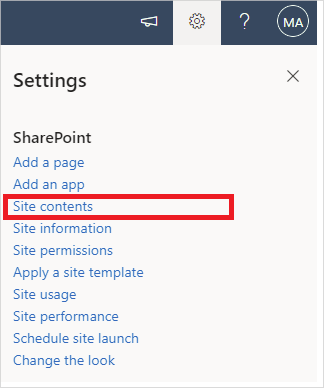
Site Contents
Site contents allows you to view and manage all of the libraries, lists, applications, and subsite on your SharePoint Online site.
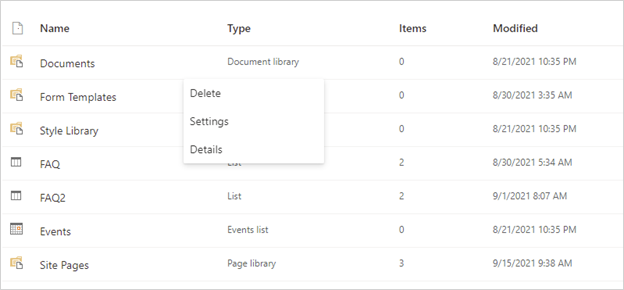
Once you click on it, you will see a nice listing of everything on your site. It will appear similar to your document library that you are used to seeing. You can click on the "…" of any of the libraries, lists, applications, or subsites to either delete, adjust the settings, or get the details on that specific piece.
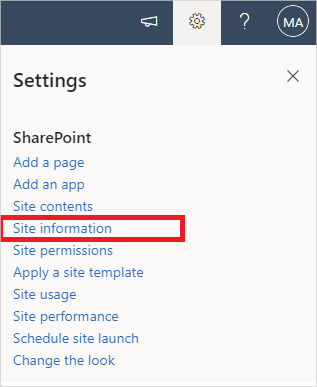
Site Information
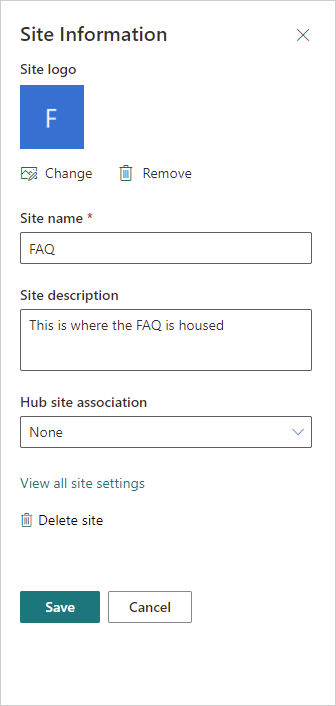
Your site information will bring up a panel in which you can change the site logo, site name, the description, which hub site it is associated to, or one of the places you can completely delete the entire site. It just provides you a basic overview of your page.
Once you have clicked on it, you will get a panel pop-up, with all of the details discussed above. If you do decide to make changes, ensure that you are clicking the save button at the bottom before exiting.
Site Permissions
Site permissions are where you can see who has certain site permissions, change the permissions that the members have, change how your site can be shared, and manage your guest expiration.
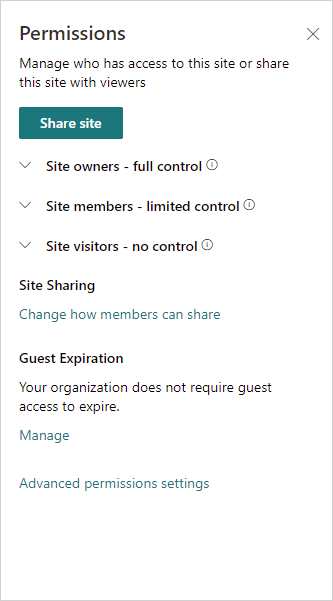
To adjust any of the site members, simply click the drop-down, you will see the name of the user, or group, and you can click the drop-down to change the type of access they have. There are three kinds of permissions, they are Full Control, Edit, and Read.
- Full control allows for full control (duh) meaning that you can view, add, update, delete approve and customize, plus maintaining site security and adding web parts. This is reserved for site owners.
- Edit permissions can read, download, add, edit, and delete content (documents, pages, announcements, and events). They are also able to share with others.
- Read permission can only read and download off of your site.
You can also manage who and how the site can be shared, and if you require access requests, where they would go. Your site sharing settings look like this:
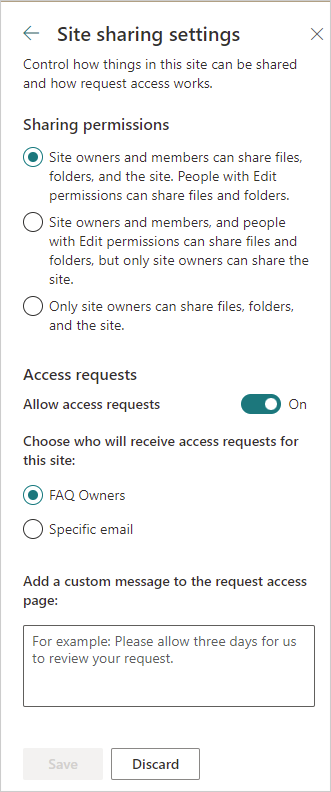
The final thing you can do is the Advanced permission settings. Here you can create groups and manage their permissions. We will be going into this deeper in the future, but for now, just know that it exists.
Apply a Site Template
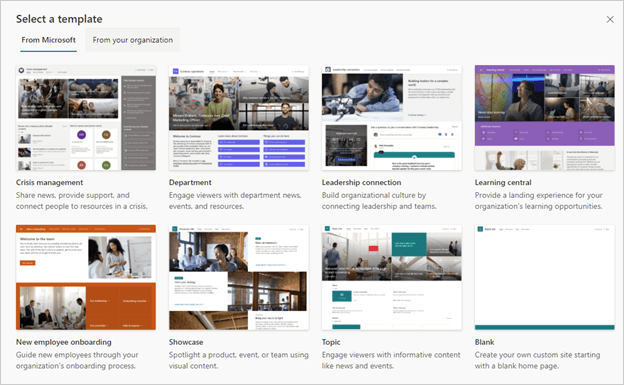
Here is where you can apply a site template to your site. When you click on this you will get a pop-up with all of the templates available to you from Microsoft, including Crisis Management, department pages, leadership pages, etc. You can also use any templates that your organization has created to keep everything uniform.
Change The Look
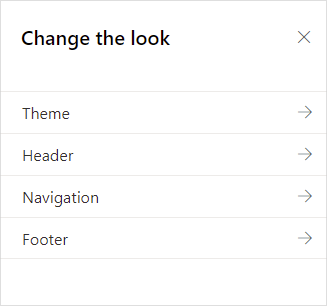
The last thing that we are going to look at is Change the look. This will give you the chance to adjust some of the settings to make your page just get that last little bit extra. Here you can change the following:
- Theme, lets you change some of the colorings in your site.
- Header, lets you change how it's laid out, the theme, and alter some of the logo thumbnails.
- Navigation, lets you choose either cascading or Megamenu. Finally;
- Footer lets you set your logo, have a display name, and change the background.
Quickly Customize Your Sites
Microsoft has so many options and customizations that you can do to your SharePoint Online site, and they are all quite easily accessed. If you have any questions about what you can do with your SharePoint Sites, such as "How do I create templates for my pages?" Or "What are the best practices for managing site permissions?", you can simply reach out to us, and we can help you with any of the questions that you have.


